December 13, 2012. I’m still amazed by the flour + water magic trick. Stir them together, give them a little time and space, get a big bowl of dough. Shape it up, put it in the oven, get a truly great loaf of bread or pizza crust.
I missed the magic for my first sixty years. Then I bought a bag of flour and went for it. Been baking ever since. Every week, I make one of those big crusty, chewy, no-kneading breads that the master, Jim Lahey, teaches in My Bread. The trick: long, slow fermentation. Thirty seconds to stir the flour, water, yeast and salt. Then 18 hours – yup, hours – of slow rising. A few hours after that, a killer loaf of bread comes out of your own little kitchen oven. It’s mind-expanding.
Much as I love this bread, I love pizza even more. So I was pretty excited when Mr. Lahey published My Pizza. My pizza’s great. But his is even Better. Now mine is, too. This is a major upgrade. And all it takes is a little planning and patience. Because his pizza dough needs no kneading – but it does need its 18 hours to rise and shine.
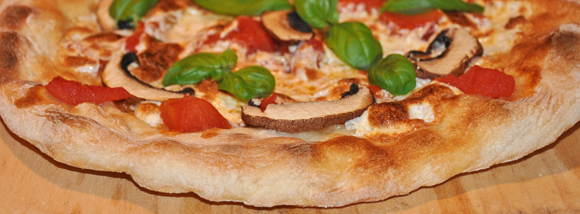
Why is this dough and crust so good? Well, the 18 hours of rising and fermentation makes a dough that’s very light because it’s full of air bubbles. And because 18 hours is time for glutens to form strong resilient strands. So you can handle it easily, stretch it out to make a very thin crust without tearing holes in it. And because those bubbles make a puffy rim around the edge of your crust. A bumpy terrain that puts some of the dough closer to your broiler’s heat. So you get a pizza crust that looks, feels and tastes like one that came out of a real pizza oven. Soft, chewy and partly charred around the edge. Thin and crisp in the center.
How to do it
For the whole truth, buy Jim Lahey’s book. Dozens of great pizza recipes. Sauce recipes. Cool combinations of topping ingredients. Here’s the Way he makes the wonderful crust that’s at the bottom of everything.
To get truly great results, Lahey recommends that you weigh the ingredients instead of eyeballing levels in measuring cups and spoons. So I used a very cool little digital scale; measured everything to the gram; and got amazing results the first time and every time since. I’ll admit that I haven’t tried it the “approximate” way. Might work just fine.
Ingredients
To make enough for 4 pizza crusts, you combine in a big bowl:
500 grams (3-3/4 cups) of all-purpose flour
16 grams (2 teaspoons) of fine sea salt
1 gram (¼ teaspoon) of active dry (instant) yeast
Action
Stir for a minute to spread the salt and yeast around. Then pour and stir in 350 grams (1-1/2 cups) of water. Stir for 30 seconds to get an even consistency. The “dough” will be moist and a little sticky.
After your thirty seconds or so of stirring, cover the bowl and leave it in a warm (room temperature) place with no direct sunlight. For 18 hours. This bread really doesn’t take much work – you just have to plan your days to fit it in your schedule.
Dealing with dough
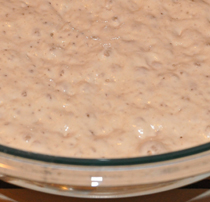
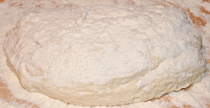
Eighteen hours later, it’s several times bigger than when you last saw it. The pure white has turned to a light golden tan. The surface is covered with funky looking bubbles. It’s still moist, airy and loose. Long, elastic strands (the developed glutens) stick to the bowl but you can use a bowl scraper to get it out in one big lump. Onto a flour-dusted work surface.
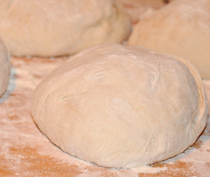
Dust its top with more flour, then divide it into 4 equal pieces. Shape each one into a ball. They should be coated with enough flour to make them easy to handle. Not at all sticky.
Now you can shape one into a pizza pie crust, but I’d wait. Wrap each one in cellophane and put them in the fridge. For a few hours, or a few days. I find it’s much easier to make a big, thin crust after the dough settles down in the fridge and stops developing.
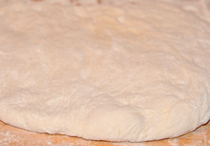
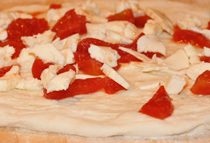
Whenever you make your first, you can shape it like I do in Pizza 101. Just roll it out with a rolling pin. Or toss and stretch it like I do in Pizza 102. Or just press and stretch it with your fingertips. Gently. Be patient. In a few minutes, you can press the dough out to a 9″ – 10″ pie.
The Oven Trick
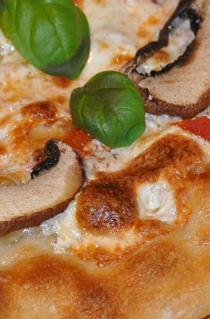
If you’re like me, you don’t have a wood-fired pizza oven that heats up to 800 or 900 F. But now you can use your home oven like Jim Lahey uses his. Put your pizza stone in the oven and preheat to 500 or 550 F, your oven’s highest temperature. The stone should be on a rack that’s 7″ – 8″ below the broiler. Ten minutes before you put your pizza in the oven, switch the oven from bake to broil. Then slide your pizza in. It’s done when the crust is golden brown with very dark, almost charred, bubbly patches all around the edge.
The Tools
A better, cheaper Pizza Stone
A better, cheaper Pizza Paddle
An even better, not quite as cheap Pizza Paddle
A better, cheaper marble rolling pin that’s heavy enough to do most of the work.
Bowl Scraper
Pastry Scraper & Cutter
Digital Kitchen Scale
4-qt Pyrex Mixing Bowl
Cost-Benefit Analysis
30 cents for a truly great 10″ – 12” pizza crust! A couple of dollars for toppings like tomato, mozzarella, mushroom and basil. A great pizza for less than $2.50.
Cost Comparison
Pillsbury’s frozen dough costs $1.25 for one crust. 4 times more than your flour & water wonder. Theirs comes with Dextrose, Sugar, Partially Hydrogenated Vegetable Oil (transfat), Glucono Delta-Lactone and Mono- and Diglycerides. I rest my dough.
For $15.99, the Domino’s in my neighborhood will make one 12″ pie with shredded mozzarella, chopped tomatoes, spinach and mushrooms. Comes with sugar, partially hydrogenated soybean oil (transfat), the dreaded high fructose corn syrup, sugar and/or mono- and tri-glycerides. Better is Cheaper.
Let’s Do The Math
The calorie count for your homemade pizza crust: 450. The sugar added to most store-bought frozen pizza dough nearly doubles that number. Total calories for my tomato-basil-mushroom-mozzarella pizza: 525. Your half: 45 minutes of brisk walking. Domino’s pie? 920 calories. Your half: A brisk 1-hour 20-minute walk.